Balloons, Birthday Party supplies
The Ultimate Guide to Using a Balloon Garland Arch Kit for Weddings and Birthday Parties
Contents
- 1 1. Why Balloon Garland Arches Are Trending
- 2 2. What’s Included in a Typical Balloon Garland Arch Kit
- 3 3. Choosing the Perfect Color Scheme
- 4 4. How to Set Up Your Balloon Garland Arch Kit (Step-by-Step)
- 5 5. Pro Tips to Elevate Your Balloon Garland
- 6 6. Common Mistakes and How to Avoid Them
- 7 7. Fun Ways to Customize Your Balloon Arch
- 8 8. FAQs About Balloon Garlands and Party Supplies
- 9 9. Conclusion and Final Thoughts
Hey there! Planning a party can be both exciting and super stressful—especially when you’re aiming to create a memorable atmosphere. One decoration that’s been taking the party scene by storm is the Balloon Garland Arch Kit. If you’ve scrolled through Pinterest or Instagram lately, you’ve probably noticed that balloon arches are just about everywhere, from classy weddings to kids’ birthday bashes. They’re fun, eye-catching, and surprisingly easy to assemble once you know the tricks.
In this guide, I’m going to walk you through everything you need to know about setting up your own balloon garland arch—whether it’s for a dreamy wedding reception or a lively birthday celebration. I’ll be sharing my best tips, insider tricks, and step-by-step instructions. Plus, we’ll tackle some common questions, so you’ll be totally confident by the time you’re done reading. Let’s dive in!
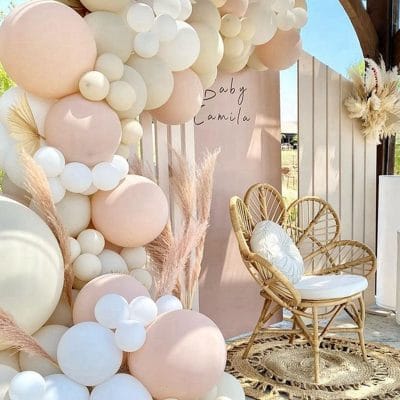
Table of Contents
- Why Balloon Garland Arches Are Trending
- What’s Included in a Typical Balloon Garland Arch Kit
- Choosing the Perfect Color Scheme
- How to Set Up Your Balloon Garland Arch Kit (Step-by-Step)
- Pro Tips to Elevate Your Balloon Garland
- Common Mistakes and How to Avoid Them
- Fun Ways to Customize Your Balloon Arch
- FAQs About Balloon Garlands and Party Supplies
- Conclusion and Final Thoughts
1. Why Balloon Garland Arches Are Trending
If you’ve ever looked at stunning event photos from big parties, chances are you’ve seen a glorious balloon arch or two. So why exactly are they so popular? Here are a few reasons:
- Instagram-Worthy Decor: Let’s be real—we all love posting pretty pictures on social media. A balloon arch instantly creates a picture-perfect focal point, making guests want to snap selfies and share them online.
- Versatile for All Occasions: Whether it’s a wedding, a baby shower, or a simple backyard birthday party, balloons are always in style. A balloon garland arch can be tailored to any theme just by tweaking the color scheme.
- Budget-Friendly Statement Piece: Compared to elaborate floral installations, balloon garlands are often more cost-effective, yet they still give off that “wow” factor.
- Easy to DIY: Once you understand the basics, assembling a balloon garland arch isn’t rocket science. A good Balloon Garland Arch Kit usually includes everything you need, plus it’s a lot easier on your wallet than hiring a professional decorator.
Basically, balloon arches check all the boxes: they’re trendy, versatile, and accessible for just about anyone who wants to add a festive flair to their event.
2. What’s Included in a Typical Balloon Garland Arch Kit
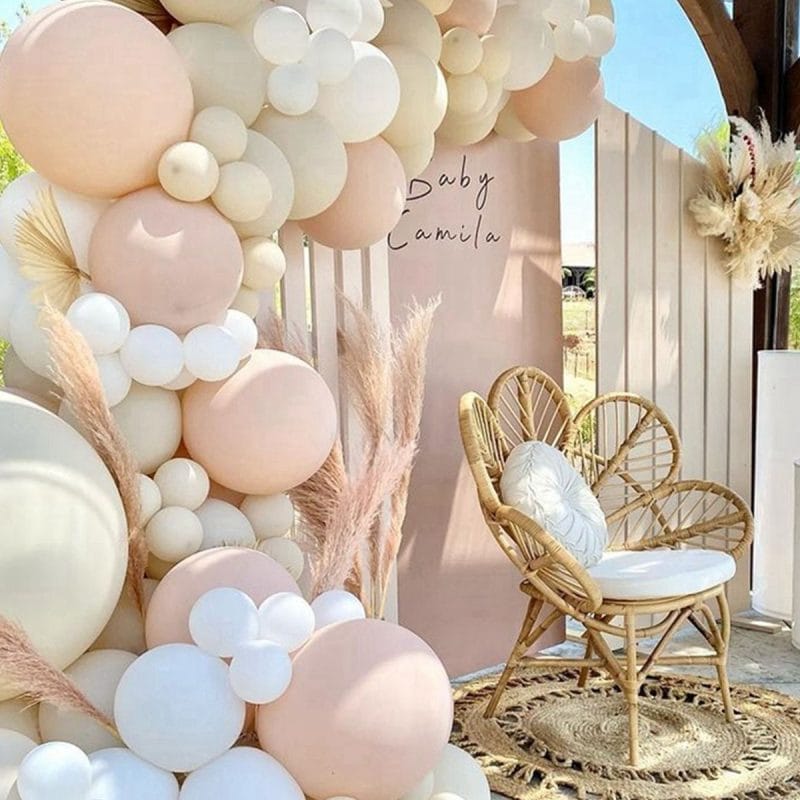
Alright, let’s talk about what you actually get when you order a Balloon Garland Arch Kit (like the one we’re featuring in our store). While each kit can vary depending on the brand or supplier, here’s the usual lineup:
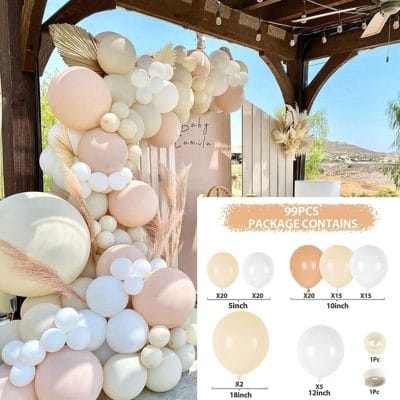
- Balloons (Latex): This is the core of the kit. Generally, you’ll see a variety of balloon sizes (like 5-inch, 10-inch, 12-inch, or even 18-inch balloons) in matching or complementary colors.
- Balloon Strip/Tape: A plastic strip with holes where you insert balloon knots to form the garland. Don’t worry, it’s pretty straightforward to use once you see it in action.
- Glue Dots or Adhesive Tabs: These little sticky dots help you secure smaller balloons onto the larger ones, filling in gaps for a fuller look.
- Ribbon or String: Perfect for hanging the garland or tying off the ends for extra stability.
- Optional Extras: Some kits may include decorative confetti balloons, metallic tassels, or faux greenery to give your arch an added pop of style.
In our particular kit, you’ll find 97 latex balloons, a roll of balloon duct tape (the plastic strip), and a ribbon to tie things together nicely. You’ll also receive an instruction sheet if you buy from a reputable supplier, but hey—this guide will be your new best friend anyway!
3. Choosing the Perfect Color Scheme
Before you jump into the setup, take a moment to consider your color scheme. Picking the right hues is half the battle! Here’s how to nail your balloon garland palette:
- Match the Event Theme: For weddings, people often go for soft, romantic tones like blush pink, cream, and gold. For birthdays, bright and fun colors—like rainbow combos or pastel assortments—tend to be a hit.
- Consider Your Venue: Will the arch be placed outdoors or indoors? Outdoor arches might benefit from bolder colors, especially if you want them to stand out in natural light.
- Think About Accents: Metallic or pearlized balloons can add a touch of glam, while confetti balloons can bring a playful vibe.
- Choose 2–4 Main Colors: Any more than four main colors can look too chaotic, unless you’re going for a rainbow theme. Sometimes, simplicity is your best friend.
Need some inspiration? Check out trending Pinterest boards or Instagram hashtags for color combo ideas. Trust me, a little planning goes a long way!

4. How to Set Up Your Balloon Garland Arch Kit (Step-by-Step)
So, here’s where the rubber meets the road—literally. Let’s walk through a typical setup process. I promise, it’s not as complicated as it looks.
Step 1: Gather Your Supplies
- Your Balloon Garland Arch Kit (balloons, balloon strip, ribbon, etc.)
- A balloon pump (hand pump or electric, whatever you have on hand)
- Scissors
- A tape measure (optional, but helpful)
- An extra pair of hands (trust me, it’s easier with a buddy)
Step 2: Inflate the Balloons
Start by inflating each balloon to the recommended size. For latex balloons, this is usually around 10–12 inches, but you might have some smaller 5-inch ones or bigger 18-inch ones. If you’re new to the balloon game, don’t overfill them. Aim for a nice, round shape rather than a pear shape—this helps the arch look more polished.
Pro Tip: If you want a more organic look, vary the inflation levels slightly so you get a mix of balloon sizes.
Step 3: Attach Balloons to the Balloon Strip
Take the balloon strip (it looks like a long plastic ribbon with holes) and start inserting the knotted ends of your balloons through the holes. There’s usually a larger “keyhole” slot where you can slip the knot in easily, then slide it over to the smaller hole to keep it snug.
- Alternate colors and sizes as you go.
- Space them out so the balloons aren’t crammed together—yet close enough to avoid big gaps.
- Continue until you have the length you want for your arch.
Step 4: Fill in the Gaps
Grab those smaller balloons or any extra balloons you set aside. Use the glue dots or adhesive tabs to stick these smaller balloons in between the larger ones. This step instantly makes your garland look fuller and more “professional,” so don’t skip it!
Step 5: Hang and Shape Your Garland
Now comes the fun part—deciding exactly how to display your creation! You can hang it across a doorway, around a dessert table, or create a standalone arch using a frame or wall hooks.
- Use ribbon or fishing line at a few anchor points (like near the ends and the center) to secure the garland.
- Adjust the shape as you see fit. Balloon garlands are surprisingly flexible.
Step 6: Add Finishing Touches
If your kit includes any extra flair like confetti balloons, foil balloons, or tassels, now’s the time to attach them. Also, if you’re adding fresh or faux greenery (like eucalyptus branches), tuck those into the gaps for a more organic vibe.
And voila—you’ve got yourself a show-stopping balloon garland arch! Take a step back, make any final tweaks, and get ready for the photo ops.
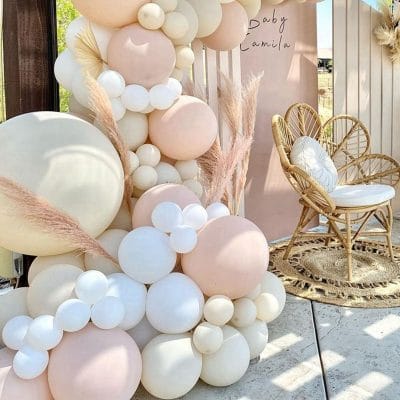
5. Pro Tips to Elevate Your Balloon Garland
- Double Stuffing: Ever wondered how people get those perfectly custom balloon shades? They place one balloon inside another before inflating. This technique can change the color or create a more opaque look.
- Experiment with Heights: Instead of just having the garland flush against the wall, consider draping it so one side hangs lower than the other. This asymmetry can look super chic.
- Balloon Sizing: Mix up balloon sizes in clusters to create depth. This is often how professionals achieve that ‘organic balloon arch’ you see on Instagram.
- Foil and Mylar Balloons: If it’s a birthday party, throw in some shaped foil balloons (like stars or hearts) or even letter balloons spelling out the guest of honor’s name.
- Plan for Transportation: If you’re assembling your garland off-site, think about how you’ll move it to the venue without popping balloons or tangling the strip.
6. Common Mistakes and How to Avoid Them
Even seasoned decorators can hit a few snags when it comes to balloon arches. Here are the biggest pitfalls and how to dodge them:
Over-Inflating Balloons
- Problem: Balloons pop easily, especially in warm temperatures or direct sunlight.
- Solution: Use a balloon pump with a gauge if you have one, or just be mindful to keep balloons round—not stretched out.
Not Allowing Enough Time
- Problem: Underestimating the time it takes to blow up dozens of balloons can lead to last-minute panic.
- Solution: Start at least a few hours before your event, or even the night before, to ensure everything’s perfect.
Poor Color Coordination
- Problem: Randomly mixing too many colors can result in a messy look.
- Solution: Stick to a palette of 2–4 colors, and plan out your color placements in advance.
Skipping the Smaller Balloons
- Problem: Large balloons alone can leave the arch looking sparse or lopsided.
- Solution: Fill gaps with 5-inch balloons or smaller balloons to add depth.
Lack of Support
- Problem: Gravity is real, folks. Without proper anchoring, your garland might slump or fall.
- Solution: Tie your garland to existing hooks, pillars, or even use Command hooks. Make sure it’s secure at multiple points.
7. Fun Ways to Customize Your Balloon Arch
So you’ve mastered the basics—awesome! Let’s explore how to make your balloon garland arch even cooler and more unique.
- Seasonal Themes: For a winter wedding, go with silver, white, and icy-blue balloons. For a summer birthday party, think bright yellows, oranges, and pinks.
- Add Florals: Artificial roses or peonies tucked between balloons can lend an elegant twist, perfect for baby showers and weddings.
- Neon Lights: If you’re hosting an evening event, LED string lights or neon tubes hidden within the garland can create a magical glow.
- Personalized Banners: Hang a banner in the center of the arch that reads “Happy Birthday” or “Congrats” for an extra personal touch.
- Thematic Props: For kids’ parties, incorporate cartoon character foil balloons or small plush toys. For a grown-up glam party, weave in some mini disco balls or metallic streamers.
8. FAQs About Balloon Garlands and Party Supplies
Q1: How long do balloon garland arches last?
Most latex balloons can stay inflated for several days, especially if they’re kept indoors at room temperature. However, they look their best within the first 24–48 hours. If your event is on a specific day, try to assemble the arch the night before or the morning of.
Q2: Can I use a helium tank instead of air?
Technically, you can fill latex balloons with helium, but remember that a traditional balloon garland is usually designed with air-filled balloons. Helium is best for floating balloons on strings. If you try to use helium for the entire garland, it might not hold the shape as well, and the balloons will eventually droop faster.
Q3: What if I want to reuse the kit?
The balloons themselves can’t really be reused, but the balloon strip and ribbon absolutely can. Just remove the used balloons carefully, then store the strip away for future parties.
Q4: Are there any safety concerns?
Keep balloons away from heat sources, direct sunlight, and open flames. Also, be mindful of small balloon pieces around young kids—they can be a choking hazard.
Q5: Can I create different shapes besides a classic arch?
Definitely! You can drape the garland in a half-moon shape, swirl it around a staircase, or even create multiple mini arches across your venue. Get creative!
9. Conclusion and Final Thoughts
So there you have it—your comprehensive guide to creating a show-stopping balloon garland arch using our Balloon Garland Arch Kit. I know it might seem like a lot of steps, but once you get started, you’ll realize it’s totally doable. Plus, the payoff is huge: your wedding, birthday party, or special celebration gets that picture-perfect decor piece that guests won’t stop talking about (and taking pictures in front of!).
Remember, picking the right colors and planning the overall look will really set the tone for your event. And if you hit any bumps along the way—like popping balloons or not knowing how to attach the arch—just refer back to this guide. Trust me, I’ve been there, and practice definitely makes perfect. If you’re ready to take your decor to the next level, go ahead and order your kit now. Your future self—and your party guests—will thank you!


